How to Apply Hotfix Rhinestones Correctly | Step-by-Step Guide
Whether you’re a garment manufacturer scaling production, a DIY creator crafting custom pieces, or a small business adding sparkle to your products, applying hotfix rhinestones correctly is the key to long-lasting, professional results. Poor application leads to fallen stones, damaged fabrics, and wasted time—ruining even the highest-quality rhinestones.
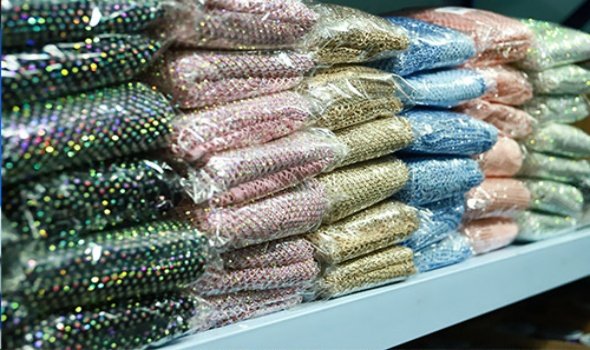
As a leading Guangzhou hotfix rhinestone manufacturer with 25 years of industry experience, we’ve created this ultimate, step-by-step guide to help you master hotfix application for every scenario. From small DIY projects to large-scale factory production, we cover all tools, techniques, and pro tips to ensure your rhinestones stay secure, vibrant, and flawless.
What Are Hotfix Rhinestones?
Hotfix rhinestones (also called iron-on rhinestones) are decorative crystal stones pre-coated with a heat-activated adhesive on the back (visible as a golden or silver foil backing). When heated with an iron, heat press, or hotfix tool, the adhesive melts, creating a permanent, strong bond to fabric, leather, vinyl, and most craft surfaces—no extra glue required.
Our premium K9 glass hotfix rhinestones feature high-brilliance cuts, strong industrial-grade adhesive, and fade-resistant colors, making them ideal for garments, accessories, crafts, and more.
Tools You’ll Need for Hotfix Application
Before you start, gather these essential tools for a smooth, professional application:
- High-quality hotfix rhinestones (our K9 glass rhinestones for maximum durability and sparkle)
- Application tool: Household iron (for DIY/small batches) or commercial heat press (for factory/large-scale production)
- Transfer tape/rhinestone paper: To hold rhinestones in place during application
- Tweezers: For precise placement of individual stones
- Heat-resistant cloth/teflon sheet: To protect rhinestones and fabric from direct heat damage
- Measuring tape/ruler: For accurate alignment
- Heat-resistant gloves: For safe handling of hot tools
Method 1: Step-by-Step Iron Application (DIY & Small Batches)
This method is perfect for DIY creators, small businesses, and custom one-off projects.
Step 1: Prepare Your Surface & Design
- Wash, dry, and iron your fabric to remove wrinkles, dirt, and fabric softener (residue weakens adhesive bond).
- Lay your fabric flat on a hard, heat-resistant surface (avoid ironing boards with soft padding, which reduces pressure).
- Plan your rhinestone design: Use transfer tape to arrange stones in your desired pattern, or place individual stones with tweezers for custom designs.
Step 2: Preheat Your Iron
- Set your iron to the cotton/linen setting (140–180°C / 285–355°F) with NO STEAM (steam melts adhesive unevenly and causes stones to shift).
- Let the iron preheat fully for 3–5 minutes to ensure consistent temperature.
Step 3: Apply Heat & Pressure
- Place a teflon sheet or heat-resistant cloth over your rhinestones to protect them from direct heat.
- Press the iron firmly onto the design, applying constant, even pressure for 10–15 seconds per section. Do NOT move the iron back and forth—this will shift stones.
- For large designs, work in small sections to ensure every stone gets full heat exposure.
Step 4: Cool & Test
- Let the design cool completely for 5–10 minutes (adhesive cures as it cools).
- Peel off the transfer tape gently. Test a few stones by lightly pressing them to ensure they are fully bonded. If any stones are loose, reapply heat for 5–10 seconds.
Method 2: Step-by-Step Heat Press Application (Factory & Large-Scale Production)
This method is the industry standard for garment manufacturers, wholesalers, and large-scale production, delivering consistent, fast, and permanent results.
Step 1: Prepare Fabric & Design
- Pre-wash and press fabric to remove wrinkles and residue.
- Lay fabric flat on the heat press platen, and position your rhinestone design (use transfer sheets for pre-made patterns).
- Cover with a teflon sheet to protect fabric and stones.
Step 2: Set Heat Press Parameters
- Temperature: 150–160°C (300–320°F) for most fabrics
- Pressure: Medium to high pressure (30–40 PSI)
- Time: 10–15 seconds (adjust for fabric thickness: thicker fabrics need 15–20 seconds)
Step 3: Press & Cure
- Close the heat press and apply consistent pressure for the set time.
- Open the press and let the design cool completely for 10–15 minutes before handling.
Step 4: Quality Check
- Inspect all stones to ensure full adhesion. Re-press any loose stones for 5–10 seconds.
Pro Tips for Long-Lasting, Professional Results
Follow these expert tips to avoid common mistakes and ensure your rhinestones stay secure for years:
- Never Use Steam: Steam dilutes the hotfix adhesive, leading to fallen stones. Always use a dry iron/heat press.
- Match Temperature to Fabric:
- Cotton/Linen: 160–180°C (320–355°F)
- Polyester/Spandex: 140–150°C (285–300°F) (lower temp to avoid melting)
- Leather/Vinyl: 130–140°C (265–285°F) with a teflon sheet to prevent damage
- Apply Even Pressure: Uneven pressure causes weak bonds. Use a hard surface for ironing, and consistent pressure for heat pressing.
- Let Adhesive Cure Fully: Never wash or wear rhinestone items for 24 hours after application—adhesive reaches maximum strength as it cures.
- Use High-Quality Rhinestones: Cheap, low-grade rhinestones have weak adhesive and poor sparkle. Our premium K9 glass hotfix rhinestones feature industrial-grade adhesive for permanent bonds.
Common Mistakes to Avoid
- Moving the iron during application: Shifts stones and creates uneven bonds.
- Using too low temperature: Adhesive won’t melt fully, leading to fallen stones.
- Skipping the teflon sheet: Direct heat can scorch fabric and damage rhinestones.
- Washing too soon: Adhesive hasn’t cured, causing stones to fall off in the wash.
- Using fabric softener on garments: Residue prevents adhesive from bonding properly.
How to Care for Rhinestone Items (Washing & Maintenance)
To keep your rhinestones sparkling and secure for years:
- Wash items inside out on a gentle, cold-water cycle.
- Use mild detergent—avoid bleach, fabric softener, and harsh chemicals.
- Air dry or tumble dry on low heat (high heat can melt adhesive).
- Never dry clean—chemicals damage adhesive and rhinestones.
- Touch up loose stones with a small amount of fabric glue if needed, or reapply heat.
Frequently Asked Questions
Q: Can I use regular glue instead of hotfix adhesive?
A: Hotfix adhesive is designed for permanent, durable bonds on fabric. Regular craft glue is not wash-resistant and will cause stones to fall off. For non-fabric surfaces, you can use industrial-strength craft glue, but hotfix is the best choice for garments.
Q: How do I fix fallen rhinestones?
A: Clean the area, place a new hotfix rhinestone, and reapply heat with an iron/heat press. For small repairs, use a hotfix applicator tool for precise heating.
Q: What fabrics are not suitable for hotfix rhinestones?
A: Avoid heat-sensitive fabrics like silk, velvet, and thin nylon, which can melt or scorch at high temperatures. For these fabrics, use non-hotfix rhinestones with fabric glue.
Q: Can I apply hotfix rhinestones to leather or vinyl?
A: Yes! Use a lower temperature (130–140°C) and a teflon sheet to protect the material, and apply firm pressure for 10–15 seconds.
Final Thoughts
Applying hotfix rhinestones correctly is simple with the right tools, techniques, and high-quality materials. Whether you’re a DIY creator or a large-scale garment manufacturer, following this guide ensures professional, long-lasting results every time.
At Guangzhou Yiben, we provide premium K9 glass hotfix rhinestones with industrial-grade adhesive, perfect for every application. Browse our full range of colors, sizes, and styles, or contact us for bulk wholesale pricing and custom solutions.