
Rhinestone Heat Transfer Temperature and Settings for Every Fabric and Stone Size
Quick answer Press most rhinestone transfers between 150 °C and 170 °C (300 °F to 340 °F) for 10 to 15 seconds at medium to firm pressure. Our German imported heat-activated grey glue melts across that whole 150 to 170 °C window and works best at 160 °C, so the middle of the range is the safe default for cotton. Drop to 150 °C for stretch knit, drop further to 140 °C for silk with a heat-protection paper, and always run a test press before a bulk run. The number that matters is not one temperature — it is the temperature that matches your glue, your stone size and your fabric at the same time.
A transfer that lifts at the corner three washes in was almost never a bad batch of stones. It was a press setting that sat just outside the window, and nobody had a reason to check. Temperature, time and pressure work as one system, and a decorator who changes only the temperature is usually solving the wrong problem.
This guide covers what the settings should be, why the fabric table alone is not enough, what each failure mode looks like, and how to lock a parameter set that survives 50 machine washes on a production line rather than on a sample stand.
What temperature should you press a rhinestone transfer at
Press between 150 °C and 170 °C for most transfers, with 160 °C as the working temperature for our grey glue system. That 20-degree band is not a suggestion, it is the melt window of a heat-activated adhesive. Below it the glue stays partly solid; above it the glue thins out and the fabric starts to suffer.
On our line, the adhesive is a German imported grey glue formulated to melt between 150 °C and 170 °C. We publish 160 °C as the working temperature because that is where the melt is complete without the film softening to the point of distortion. A decorator pressing at 160 °C on cotton is sitting in the middle of the window, which leaves room for the small variation every heat press has across its platen.
The Fahrenheit equivalent is 300 °F to 340 °F, and this is where a lot of US buyers get caught. A press calibrated in Fahrenheit can be ten degrees off, and ten degrees at the top of the range is the difference between a clean bind and a scorched panel. If your press has never been checked against a surface thermometer, do that before you trust the readout.
One more point that the fabric tables never mention. Two transfers that look the same can carry different adhesives, and a 170 to 180 °C setting that a European supplier prints is not wrong — it simply belongs to a harder glue system that needs more heat to activate. The setting follows the adhesive chemistry, so read the spec on the transfer before you copy a number from a chart. Our rhinestone transfer range lists the glue window on every product so the default is never a guess.
Why heat press settings matter for rhinestones
Heat-activated glue has to melt fully, flow into the fibre, and then lock as it cools. If it never fully melts, it only touches the surface of the fabric instead of gripping it. If it melts too far, it spreads sideways, starves the bond and can leave a shiny ring around each stone.
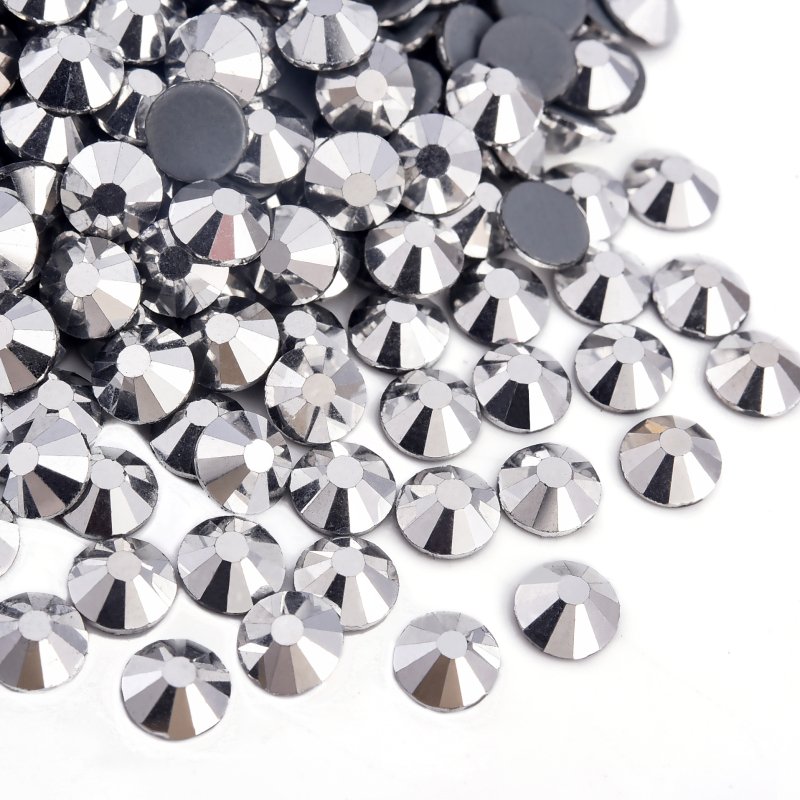
Picture the underside of a hotfix stone. The adhesive sits as a thin grey disc, flat and dry at room temperature. When the platen comes down, heat passes through the carrier film, through the stone and into that disc. In the 150 to 170 °C window the disc turns to a soft, tacky fluid that sinks into the weave of the cloth. Take the heat away and it cures back to a solid, but now the solid is tangled into the fibre rather than sitting on top of it. That mechanical interlock, not surface stickiness, is what holds a stone through a wash cycle.
Pressure is the second half of the same event. Melting the glue does nothing if the fluid never reaches the fibre, and pressure is what pushes it there. A light touch leaves the glue pooled on the fabric surface; firm, even pressure drives it into the weave so the bond has depth.
Time is the third input, and it is the one people cut first. Fifteen seconds feels long when you are feeding a press all day, so the time gets trimmed and the temperature gets raised to compensate. That trade is a false economy. It can leave the glue under-melted in the middle of a large stone while the carrier film around it already shows heat stress. Pick a temperature and a time that work together, then keep them.
What time and pressure should you use
Use 10 to 15 seconds at medium to firm pressure as a general rule. Thin, heat-sensitive fabric sits at the low end of the time range, heavier woven cloth sits at the high end, and the pressure stays firm enough to drive glue into the weave without crushing the stones.
Time and temperature are not independent dials. Running a shorter press at a higher temperature can look fine on the surface and still leave the core of a large stone under-bonded, because heat takes longer to travel through a 6.4 mm SS30 than through a 2.0 mm SS6. That is why the reliable answer is a temperature inside the melt window plus a press long enough to let the glue complete its job all the way down.
Pressure is the setting decorators understand least. Most presses do not display a pressure number at all, so pressure gets set by feel and never revisited. The useful test is simple — after pressing, the fabric under the design should show a faint, even impression of the stones, with no shine marks and no flattening of the crystal facets. If the impression is missing, the bond has no depth. If the fabric is polished flat, the platen is too hot or too heavy.
A short pre-press before the transfer helps more than most people expect. Three to five seconds on the bare garment removes moisture and levels wrinkles, so the transfer is being pressed onto a flat, dry surface rather than a damp one. A final re-press of five to ten seconds over a protective cover, after the carrier film is away, adds a second bite of heat into the bond and measurably improves wash life.
| Setting | Default | When to change it |
|---|---|---|
| Temperature | 160 °C (inside a 150-170 °C window) | Lower for spandex and silk, keep mid-range for cotton |
| Time | 10 to 15 seconds | Longer for heavy woven cloth and large stones, shorter for thin knits |
| Pressure | Medium to firm | Firm on denim and canvas, lighter on silk and thin fashion knits |
| Pre-press | 3 to 5 seconds | Always, on any fabric that creases or holds moisture |
| Final press | 5 to 10 seconds | After peeling, over a protective cover, on wear-heavy pieces |
What settings should you use for cotton, polyester, blends and stretch fabric
Match the press to the fibre, not to the stones. Cotton takes the strongest parameters, spandex and other stretch knits need the temperature pulled back, and silk needs the lowest setting with a protective layer. Our own tested numbers run on the left of the table below.
Cotton and cotton-rich blends are the easiest substrate and the strongest bond. We press them at 165 °C, 40 PSI for 15 seconds. The fibre tolerates heat well, holds pressure without distorting, and gives the glue plenty of texture to grip.
Spandex and stretch knit are where most failures happen, because the fabric moves after pressing and the glue line has to move with it. We drop to 150 °C at 30 PSI for 12 seconds. Overheating spandex does not just scald the surface, it weakens the elastane itself, so the garment loses recovery as well as gaining a burn mark. On a highly elastic panel, a sewn or net-elastic transfer is often a better answer than a rigid hotfix sheet, because the bond has to survive stretch, not only heat.
Silk and other delicate fibres sit at the low end. We press at 140 °C, 20 PSI for 10 seconds with a heat-protection paper over the design. The paper spreads and slows the heat so the fibre never sees the platen directly. Treat the wash life as shorter here — on silk, expect roughly 20 to 30 machine washes rather than 50, because you deliberately pressed below the temperature that gives the hardest bond.
Polyester is the middle case. It takes a mid-range press near 155 to 165 °C for 10 to 15 seconds, and the exact number depends on the weave weight. Print-heavy polyester can be sensitive to surface shine, so keep the pressure even and avoid idling the platen in one spot.
Denim, canvas and heavy cotton drill take the firm end. Hold the temperature inside the window, push the time toward 15 seconds and use firm pressure, because a thick weave needs the glue driven deeper to reach the fibre it is bonding to.
| Fabric | Temperature | Pressure | Time | Extra step |
|---|---|---|---|---|
| Cotton and cotton-rich blends | 165 °C | 40 PSI | 15 seconds | None |
| Polyester and poly blends | 155 to 165 °C | 30 to 40 PSI | 10 to 15 seconds | Watch for surface shine |
| Spandex and stretch knit | 150 °C | 30 PSI | 12 seconds | Lower heat protects elastane |
| Silk and delicate fibres | 140 °C | 20 PSI | 10 seconds | Heat-protection paper over the design |
| Denim, canvas and heavy drill | 160 to 165 °C | 40 PSI and firm | 15 seconds | Pre-press to flatten the weave |
What the fabric alone never tells you is the rest of the picture. The adhesive grade, the stone size and the thickness of the design all shift the right number. A dense SS30 panel on heavy denim is not the same press as a single SS10 line on the same cloth, even though both are “cotton”. The next two sections pull the stone size into the calculation. If you are matching stones to a garment for the first time, the rhinestone size guide covers the SS scale before you set a press param.
What happens if the temperature is too low
The glue only partly melts, so the bond forms on the surface and the stones lift when the carrier film comes away. Under-heated transfers often look fine coming off the press and fail on the first wash, because the surface contact was never a real bond.
The tell-tale signs of a low press are consistent. Stones stay stuck to the carrier film when you peel it. The design feels loose or slightly raised when you run a finger across it. Some stones drop in the wash while the rest stay, which is the classic fingerprint of an uneven platen rather than a bad batch.
Under-heating also hides one specific trap with large stones. The glue near the edge of an SS20 or SS30 may have melted while the centre, under more glass, never reached the activation temperature. That stone passes the peel test and then falls out after a few wear cycles, which is far more expensive to fix than catching it at the press.
If a press looks under-done, resist the instinct to raise the temperature alone. Check the press time, the pressure and whether the garment was pre-pressed first, because a low-pressure or short press produces exactly the same symptom as a cool one. Raising the heat when the real problem is pressure over-melts the glue and creates a new failure while the original one stays.
What happens if the temperature is too high
The glue over-melts and spreads, the fabric can scorch, shine or discolour, and the carrier film can warp and drag the stones out of alignment. On synthetic fabric, the heat damage is permanent and usually shows up as a glossy patch around the design.
Over-melted glue loses its grip rather than gaining it. Instead of sitting as a disc that sinks into the fibre, it flows outward, thins under the stone and starves the bond. The result is a stone that looks fully set but has less adhesive holding it than a properly pressed one.
Fabric damage is the more visible cost. Polyester and other synthetics take a permanent shine mark, sometimes called a press crease or glazing, where the heat polished the surface. Wool and heavy blends can scorch and lose colour. Elastane weakens and stops springing back. None of these reverse with a second press, so a hot platen turns a piece of stock into waste.
The carrier film gives you an early warning if you watch for it. A film that curls, wrinkles or pulls tight around the stones is being overheated, and the stones may have shifted off their layout before the glue has even cured.
| Symptom | Likely cause | What to change first |
|---|---|---|
| Stones lift with the film | Under-heated or under-pressured | Confirm the window, then check pressure and time |
| Loose design after pressing | Glue not driven into the fibre | Increase pressure before increasing temperature |
| Shine marks or glazing on the fabric | Platen too hot for the fibre | Drop the temperature and add a protective cover |
| Film curls or stones shift | Film overheated | Lower temperature, watch the time |
| Even stone drop-out after washing | Bond too shallow | Re-test pre-press, pressure and time together |
How much pressure should a heat press use
Medium to firm pressure is right for most work, and heavier fabrics need the firm end. The goal is enough force to press the melted glue into the weave without flattening the crystal or glazing the cloth underneath.
Because most presses do not display pressure, calibrate it by result instead of by a dial. Press a test piece and look at the fabric when the film comes off. A good press leaves a faint, uniform outline where the stones and the design edge sat. A too-light press leaves almost nothing, and a too-heavy press leaves a polished or flattened patch. That outline is your pressure gauge.
Thickness changes the target. Denim, canvas, fleece and multi-layer hoodie panels absorb force, so they need the firm end of the range to get that outline. Silk, chiffon and thin fashion knits deform easily and need a lighter hand with a protective cover. If the platen is not parallel to the lower plate, one side of a large design reads under-pressed while the other reads over-pressed, which is why an even platen matters more than a high number.
If the press feels too heavy on a thin fabric, do not force it. Reduce pressure and let a slightly longer time carry the bond, as long as the temperature stays inside the window. Force is the wrong tool for delicate cloth.
Should you peel hot or cold
Peel cold or warm for most rhinestone transfers, and only peel hot when the carrier film is specifically built for it. The film, not the stone, decides the timing, and peeling too early is one of the most common reasons a good design fails.
A cold peel lets the adhesive fully cure before the film comes away, so each stone stays seated in its pocket and the bond is at full strength. It is slower, which is why production lines try to rush it, but it is the safer default on dense designs and on any fabric that has just been through a hot press.
A warm peel is a middle path. You let the piece cool for a few seconds until the film is warm rather than hot, then pull it back low and slow, at a shallow angle rather than straight up. The shallow angle keeps a lifting stone from dragging its neighbours out of the layout.
A hot peel only works with a hot-peel film and is usually reserved for large single-stone or sparse designs where the glue cures almost instantly. On a dense transfer, a hot peel risks pulling partly set stones out of line. When in doubt, wait. A piece that is fifteen seconds too cool costs nothing; a design that has to be re-pressed or scrapped costs the whole garment.
Does the setting change with stone size
Yes, and it is the part most guides leave out. Larger stones need a little more heat and a little more time, because heat has to travel further through the glass before the glue underneath reaches its activation temperature. On the same fabric, plan to press SS16 and upward slightly longer or slightly hotter than SS6 to SS10.
The reason is thermal mass. A 2.0 mm SS6 heats through almost instantly, so a 10-second press is plenty. A 6.4 mm SS30 holds far more glass above the glue line, and the adhesive under the centre of that stone is the last part of the design to reach temperature. If you press a mixed panel at the SS6 setting, the small stones are perfect and the large ones are under-bonded, which is exactly the drop-out pattern that confuses people after washing.
| Stone size | Diameter | Timing on cotton | Note |
|---|---|---|---|
| SS6 to SS10 | 2.0 to 2.8 mm | 10 to 12 seconds at 165 °C | Reaches temperature quickly, easy to over-press |
| SS16 | 4.0 mm | 12 to 15 seconds at 165 °C | Standard size, mid-range timing |
| SS20 | 4.8 mm | 15 seconds at 165 °C | Give the glue time to heat through the glass |
| SS30 | 6.4 mm | 15 seconds at 165 °C, firm pressure | Most thermal mass, most sensitive to a short press |
The practical rule for a mixed panel is to set the press for the largest stone on the sheet and then protect the smallest ones with the carrier film and an even platen, rather than splitting the difference. Our K9 optical crystal carries a refractive index near 1.9, 12 to 14 facets and a Mohs hardness of 6 to 6.5, so the glass itself handles the heat well — the limit is the adhesive underneath and the fabric below that, not the crystal.
How do you test settings before bulk production
Run a full test cycle on an offcut of the actual production fabric before a single bulk transfer is pressed. Press a sample, peel it, stretch it, wash it, and record the exact parameters that survived. That record, not a chart, becomes the standard for the run.
The test has five steps, and skipping any one of them is how a bulk run goes wrong.
Start with the real fabric. Not a similar weight off a shelf — the exact cloth you will produce against, because coating, weave and dye can all change how the glue bites. Press a small sample at your chosen parameters using the same platen pressure and cover sheet you will use in production.
Peel the film the way you plan to peel it in the run. If the stones lift with the film, the bond is not there yet, and you have found the problem while it costs one sample rather than one thousand garments.
Stretch the sample if the fabric has any give. A bond that holds on a flat panel can still crack on a stretch knit, and the test is the only place that shows up cheaply.
Then wash it. This is the step people skip, and it is the only one that predicts real life. We test to ISO 6330, the standard wash method, and our K9 crystal with the grey glue holds through 50 machine wash cycles with under 2% stone loss. Cheap acrylic stones with low-grade yellow glue lose more than 30% of their stones after only 5 cycles of the same test. Run at least a short wash cycle on your sample before committing.
Finally, record everything. Temperature, time, pressure, cover sheet, peel timing, fabric lot, stone size and glue grade. That sheet goes to the press operator and onto the job file, so the next run of the same design repeats the parameter that passed instead of re-inventing it.
| Stage | What to do | What a pass looks like |
|---|---|---|
| Sample press | Press one small piece on the real fabric | Clean impression, no shine marks |
| Peel check | Peel at the planned timing and angle | Stones stay on the fabric, film comes away clean |
| Stretch check | Flex and stretch the sample | No cracking or lifting at the design edge |
| Wash test | Run an ISO 6330 style cycle | Minimal or no stone loss, design intact |
| Record | Log every parameter | A written standard the next run can repeat |
What are the most common heat press mistakes
The same handful of errors account for most transfer failures, and almost none of them is caused by the stones. They are press habits — skipped pre-press, guessed pressure, rushed peeling and a temperature raised to fix a problem that pressure actually caused.
Skipping the pre-press is the quiet one. Moisture trapped in the cloth flashes to steam under the platen and pushes the transfer up just as the glue is trying to sink in, so the bond forms over a layer of vapour instead of fabric. Three to five seconds on the bare garment removes it.
Guessing the pressure is the second. A press that is a fraction too light leaves the glue on the surface, and no amount of extra heat will drive it into the fibre. Set the pressure by the impression it leaves, and check it every time you change fabric.
Peeling too early is the third. A design peeled hot on a cold-peel film lifts stones by the dozen, and the damage is invisible until the garment is washed.
The fourth is using temperature as the only corrective tool. When stones will not stick, the first two things to check are pressure and time, plus whether the piece was pre-pressed. Adding heat to an under-pressured job over-melts the glue and creates a fresh fault.
The fifth is forgetting the final press. A second pass of five to ten seconds over a protective cover, once the film is off, drives additional heat into the bond and is one of the cheapest ways to raise wash durability. It costs seconds and it shows up in the wash test.
If you catch a piece after the press and the stones look loose, do not scrap it immediately. Cover the design and re-press for a short, firm pass. Covering the stones protects the facets from the platen while the adhesive gets its second chance.
How to make rhinestone settings survive 50 washes
Settings get a transfer onto the garment. The wash routine keeps it there. The two work together, and a perfect press can still be undone by a hot cycle and a dryer.
Our K9 crystal set with the German grey glue, pressed inside the 150 to 170 °C window at the fabric’s correct parameters, resists 50 machine wash cycles under the ISO 6330 standard with under 2% stone loss. That figure comes from pressing to spec and then washing to the standard — it is not a claim about an arbitrary press setting on an arbitrary cloth.
How you wash is the second half. Turn the garment inside out so the stones face the fabric, not the drum. Use cold water, because heat is what softens the glue line. Skip the dryer entirely and hang or lay the piece flat, and keep bleach and harsh solvents away from the design. Stone loss almost always starts at the bond rather than in the crystal, so protecting the adhesive is the whole game.
There is an honest limit worth stating. On silk and other delicate fibres, expect roughly 20 to 30 washes rather than 50, because you pressed at 140 °C to protect the fibre and that softer bond wears sooner. On heavy-movement stretch garment, use a net-elastic or sewn option for the areas that flex hardest, and treat the wash count as a guideline rather than a guarantee. For a deeper look at cycle settings, the guide to washing rhinestone garments covers the routine in detail.
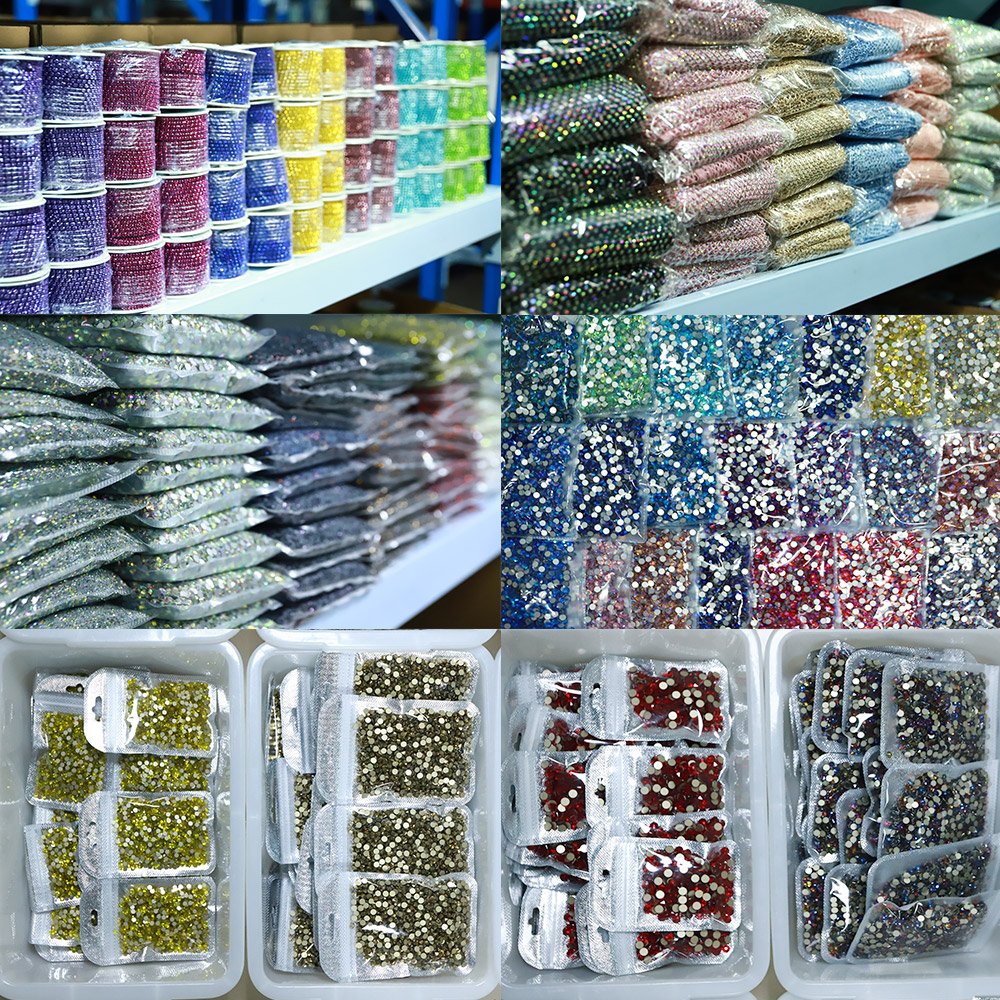
Stones run SS6 to SS30 and we hold more than 400 colours in stock with Pantone matching, all produced in our own Guangzhou Baiyun workshop after 12 years of cutting crystal. Whatever parameters your fabric needs, the stone that sits under them is built to take the heat.
Explore the rhinestone transfer series
This article sits inside our transfer cluster. If your next decision is about the product rather than the press param, the two pages below are the place to start.
– Rhinestone transfer — how a transfer is built, what the carrier film does and how to choose the right format for a run. – Rhinestone patches — the patch format explained, when a patch beats a full transfer and how each fixing method behaves.
If you are still choosing between formats for a specific garment, send us the fabric and the design and our team will return a tested parameter set with the sample.
Frequently asked questions
What temperature should I press a rhinestone transfer at? Press between 150 °C and 170 °C (300 °F to 340 °F) for most transfers, with 160 °C as the working temperature for our German imported grey glue. Cotton sits comfortably in the middle of that window, spandex drops to 150 °C and silk drops to 140 °C with a heat-protection paper. Always verify your press against a surface thermometer before trusting the readout.
How long should I press a rhinestone transfer? Ten to fifteen seconds covers most work. Thin knits sit at ten to twelve seconds, cotton and heavy woven cloth sit at fifteen, and large stones such as SS30 need the longer end because the heat has to travel through more glass before the glue underneath reaches temperature. Add a five to ten second final press over a protective cover after peeling.
Why do my rhinestones fall off after washing? Almost always a shallow bond rather than a bad stone. That means the glue did not fully melt or was never driven into the fibre, usually because the press was slightly cool, the pressure too light, or the pre-press was skipped. Re-test with the correct window and firm pressure, and run a wash test on a sample before the next bulk run.
Should I peel a rhinestone transfer hot or cold? Cold or warm for most films. A cold peel lets the adhesive cure fully before the film comes away, which protects the bond on dense designs. Only peel hot when the carrier film is made for it, and even then pull low and slow at a shallow angle so a lifting stone does not drag its neighbours out of line.
Does pressure matter as much as temperature? Yes. Melting the glue only makes it fluid — pressure is what pushes that fluid into the weave of the fabric. Set pressure by the faint, even impression it leaves on the fabric, use firm pressure on denim and canvas, and lighter pressure on silk and thin knits. If stones will not stick, check pressure and time before you touch the temperature.
Do I need a different setting for different stone sizes? Yes. Heat takes longer to reach the glue under a large stone, so SS20 and SS30 need a slightly longer or hotter press than SS6 to SS10 on the same fabric. On a mixed panel, set the press for the largest stone on the sheet and keep an even platen so the smallest stones are not over-pressed.
How do I test settings before a bulk run? Press a sample on the exact production fabric, peel it at your planned timing, flex and stretch it if the cloth has give, then wash it. Check the stone loss, then write down the temperature, time, pressure, cover sheet and peel timing. That record becomes the standard for the run and for the next reorder of the same design.
Can I trust the temperature setting on a fabric chart alone? No. The fabric is only one of three inputs. The adhesive grade and the stone size change the right parameter as much as the fibre does, which is why a European supplier printing 170 to 180 °C is not wrong — that number belongs to a harder glue system. Match the temperature to the adhesive window on the transfer, then adjust for fabric and stone size.
For a 12-hour answer on the right parameter for your fabric and design, message us on WhatsApp at wa.me/8613692450325, call or message +86 13692450325, or email rhinestonewholesale8@gmail.com. Stock colours ship the same day payment clears. Custom runs ship in 7 to 15 days depending on order quantity.
Need a size or color recommendation for your next order? Send us your fabric type, design, and target price — we reply within one business day. WhatsApp +86 13692450325 · rhinestonewholesale8@gmail.com